Connect a company mailbox (IMAP / SMTP)
Check your mailbox’s supported authentication method, fill the connection form, assign the responsible agent, and verify an incoming email and reply.
- Who uses it
- Administrators
- Content updated
- 2026-09-09
Sign in to your company workspace first. Add the /app/… paths below to your company system URL.
Before you start
- Administrator access to AllOne Sales and the mailbox account you want to connect
- The mailbox provider allows IMAP and SMTP access (most business mailboxes require switching it on first)
- At least one team and one agent exist, because the channel must be assigned to a responsible agent before it can be saved
Steps
Confirm the provider authentication method
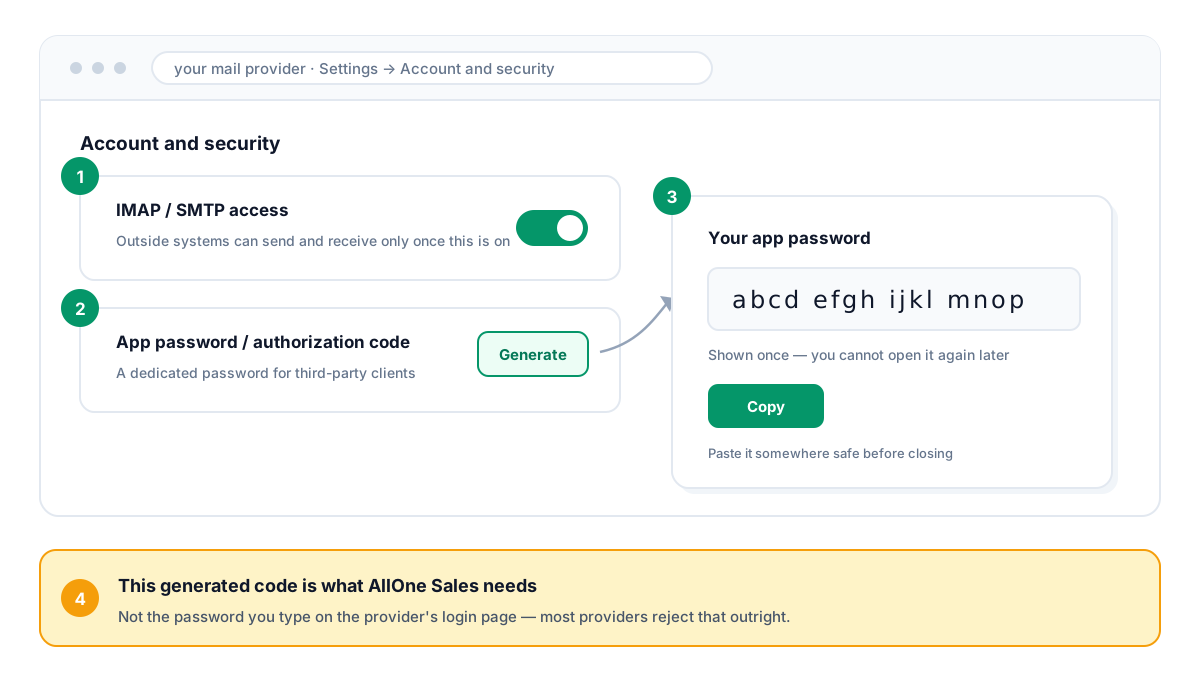
First check the mailbox provider’s IMAP/SMTP and authentication requirements. For a provider that supports app passwords or authorization codes, generate one in its security settings: this is not your normal web login password. Microsoft 365 / Exchange Online has retired IMAP basic authentication; app passwords do not replace OAuth. If your AllOne Sales page only has a password field, ask the administrator to confirm a supported OAuth connection before continuing. A provider preset alone is not proof of compatibility.
Expected result: You have confirmed the supported authentication method, or stopped to resolve an unsupported one.
Open Channels → Email and start the binding
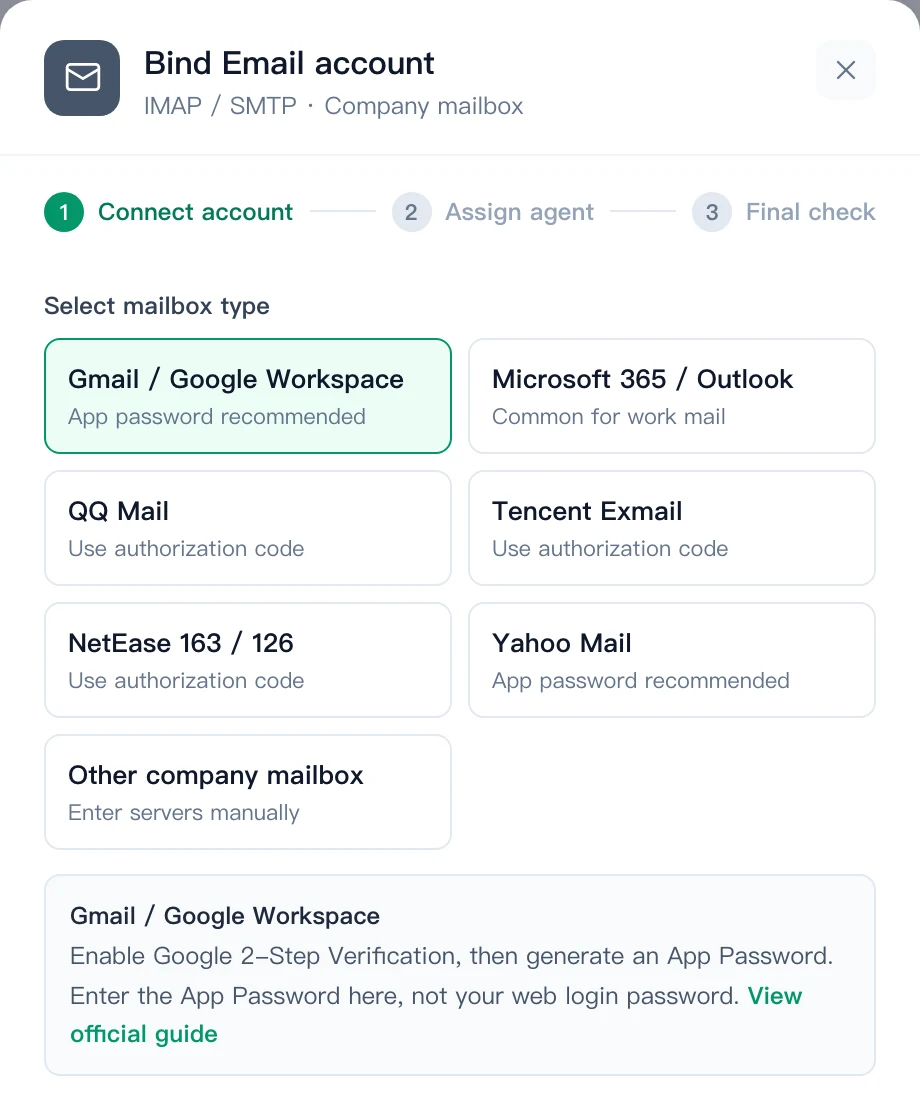
Open Channels → Email at /app/channels/email and start a new binding. For a supported password-based mailbox, choose its provider preset or Other company mailbox. The wizard contains Connect account, Assign an agent and Completion check. Microsoft 365 / Outlook in the preset list must still pass the authentication check described above.
Expected result: The connection form opens with your provider selected and its own setup hint shown.
Check the servers and ports, then test the connection
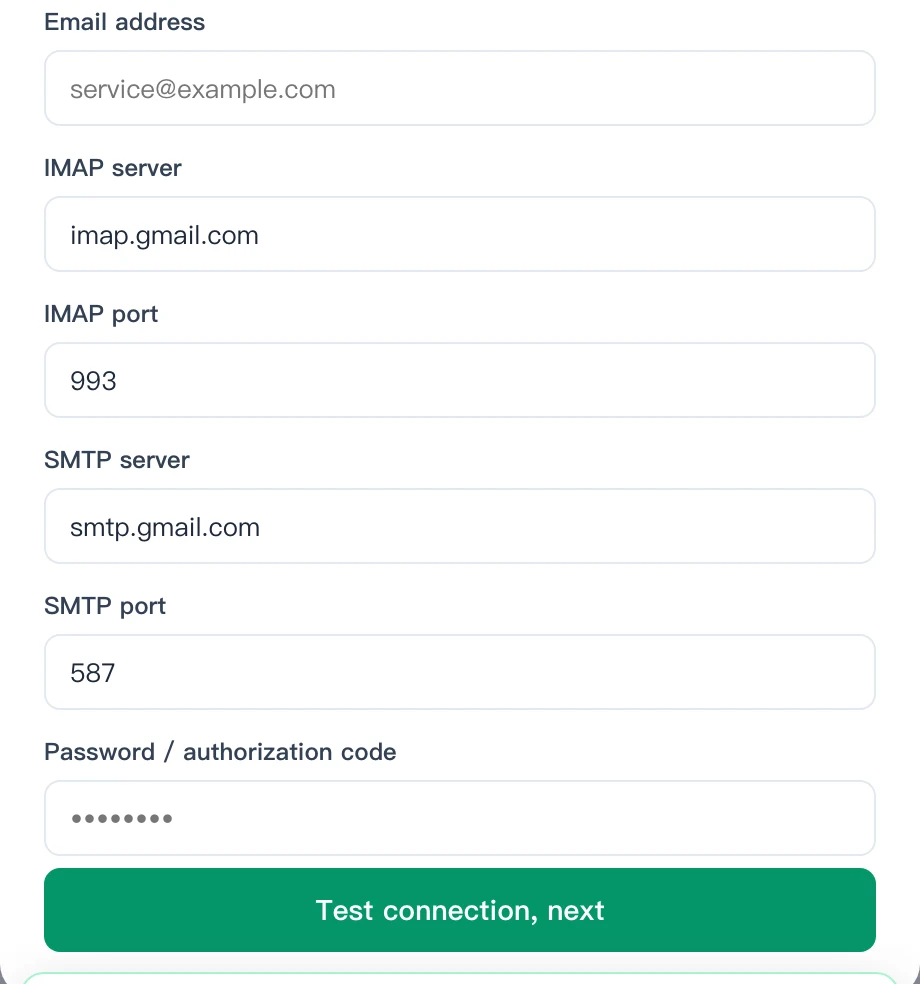
Check the preset’s IMAP and SMTP hosts, ports and encryption requirements against your mailbox administrator’s settings. For Other company mailbox, obtain those values first. Enter the mailbox address and supported authorization code or app password, then choose Test connection, next. Read a failure message before retrying; do not change ports at random.
Expected result: The connection test passes and the dialog moves on instead of showing an error.
Name the account, pick the team and assign an agent
Give the account a recognizable display name, choose the available team if required, then search for and select the agent who will answer new email. An agent must be selected before completion. If no team or agent is available, ask the company administrator to check the current channel assignment setup; do not look for a retired Team management menu.
Expected result: Incoming mail lands with a named owner instead of sitting unclaimed.
Read the self-check, then send a real test email
Read each connection-check result. After the checks pass, send a message from an external mailbox to the connected address. Find it in the shared inbox, reply, then confirm that the external mailbox received the reply. Only this real two-way check confirms the channel can be used for service.
Expected result: A message travels in and a reply travels back out through the shared inbox.